Plumbin' and routin' and strippin'
Earlier in the week, I started framing in the niches for the shower. With the walls completely opened up, it’s trivial to add a bit of framing and get some nice custom-sized niches for storing all the various doo-dads that tend to accumulate in the shower. After spending a fair amount of time cutting, aligning, and leveling all of the lumber, I stood back to admire my work, and realized that I’d completely forgot to account for the thickness of the backer board and tile, so my finished niches would have been about 1 inch shorter than a shampoo bottle. Ooops! At least I figured it out now, rather than after everything was done, so it was trivial enough to fix…

A niche product
Then it was on to bringing the rest of the plumbing lines into the bathroom, and plumbing the shower “tree” (lines from the valve to the tub filler and shower head). Unfortunately, I ran out of the plastic bend supports that are somewhat necessary when working with PEX; they help to ensure that any bends in the tubing aren’t so tight that they kink the tube. So for now, I have the lines all connected and routed in the bathroom, but they’re just dangling in the basement. And of course, the bend supports are on backorder, so I’m at the mercy of my supplier.

Being unable to finish up the plumbing, I decided to start working on some of the trim-related projects. During a previous renovation, the original baseboards were removed and replaced with plastic “tile” panels; part of our goal is to bring back as much of that detail as possible. Unfortunately, the baseboards on the second floor are approximately 8 inches tall, and I’ve been unable to find a readily available replacement, so I decided to make my own. It’s a crazy thought, really, since I made that decision before I’d even bought or used a router. But yesterday and today, I set about making it happen.
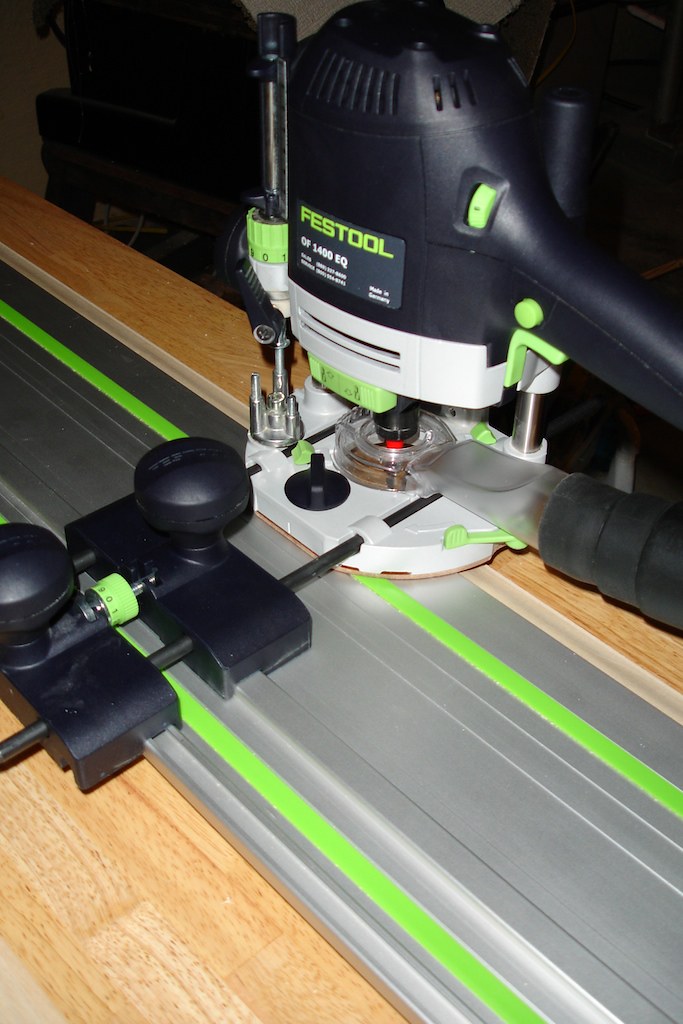
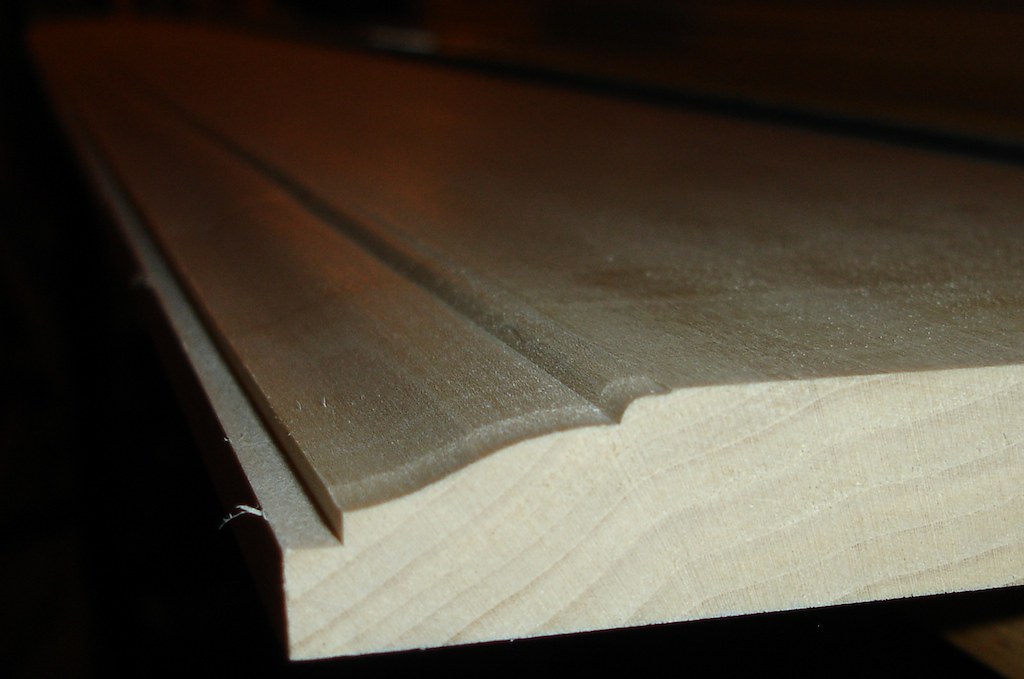
I bought my router a few months ago, without really knowing much of what exactly goes into making moldings. Any experienced woodworker would know, as I now do, that I would be much better served using a router table, rather than a standalone plunge router. But since that’s what I have, that’s what I used. I had managed to find a “champagne ogee” router bit that came remarkably close to the profile of the existing trim, and bought some 1x8 lengths of poplar to mill down. After several practice runs, I managed to get the settings on the router locked in to cut the bulk of the profile with the ogee bit. Three passes on each board, and I was most of the way there. But unfortunately, I didn’t have the foresight to photograph that part.
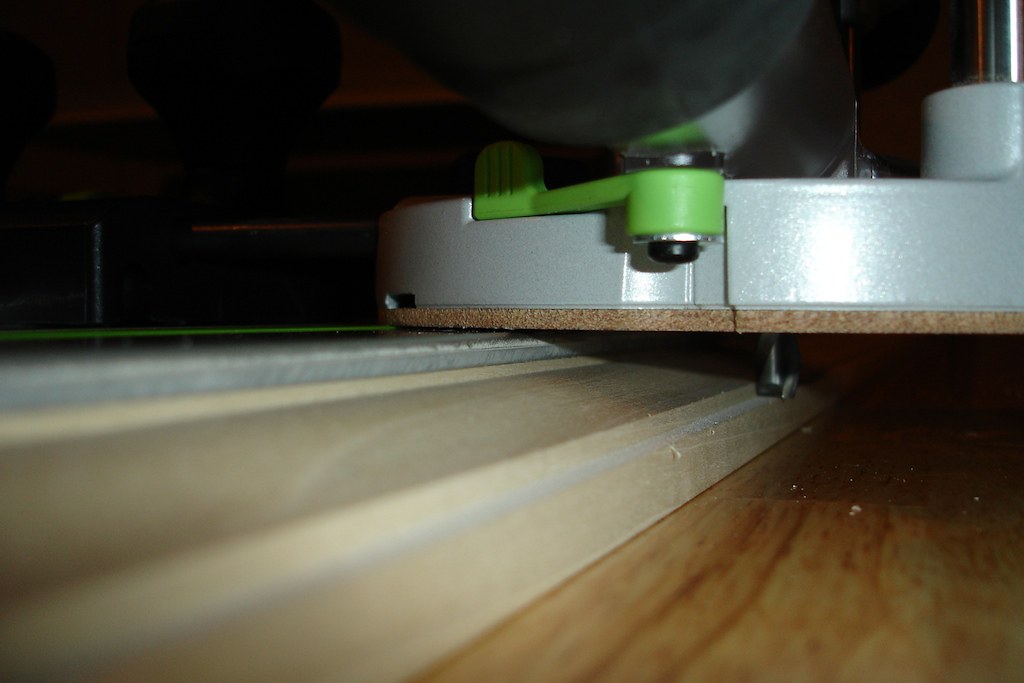
The original trim has a small rabbet at the top that the ogee bit didn’t include, so I still had to cut that. I decided to use a simple spiral-cut bit, mostly because I don’t really have a huge assortment of bits to choose from yet. Since cutting the ogee had removed enough material that using the router’s edge guide was now tricky, I had to find a different way to keep the rabbet consistent. I settled on using the guide rails from my circular saw, set a fixed distance back from the top edge of the molding.

With a few quick practice cuts, I quickly had the settings dialed in to give me results that look very close to the existing baseboards. The new baseboards still need to be sanded down to take the “machined” look off of them, but they already look remarkably close to the desired result. I’ll be sure to take some side-by-side shots once I have some scraps to play with.
And since I was working on the moldings today, I decided to also spend some time stripping the old paint off of the existing window and door trim. Most of the casework was removed during demo, and is being stripped in the basement, but some of it (like the door jamb) has to be stripped in place. We’re using a soy-based paint stripper that has turned out to be pretty easy to use. It comes as a paste that you apply to the painted surface and let sit for up to 24 hours. It doesn’t take long before you can see the layers of paint literally bubbling off of the wood.
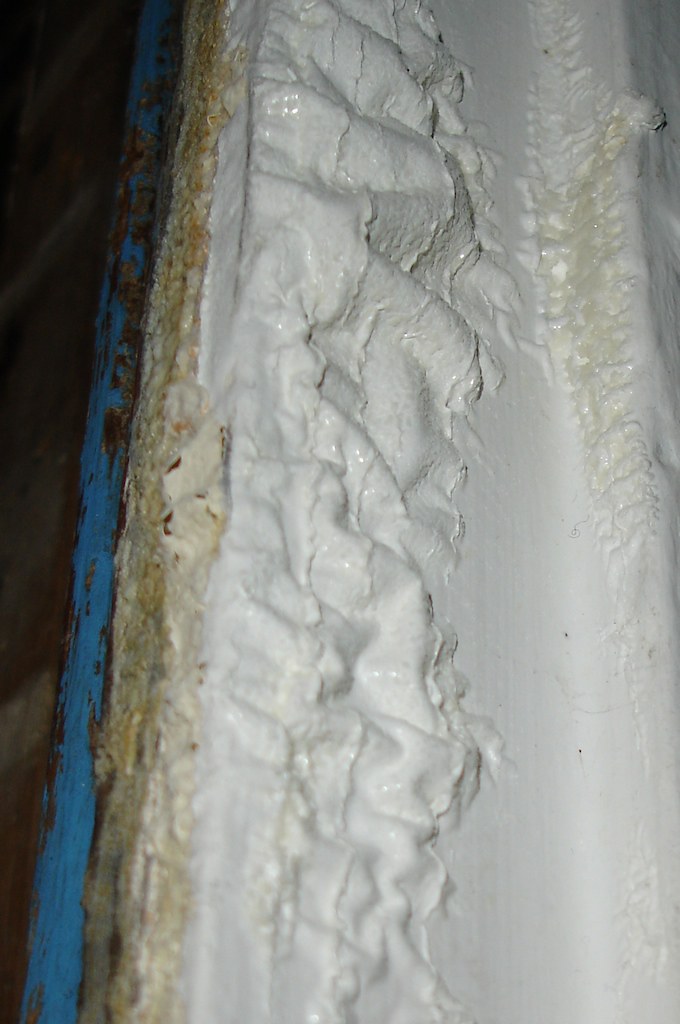
The manufacturer claims that one application can remove up to 15 layers of paint, but I’ve found that to be a bit idealistic. When stripping the salvaged stone that we bought, I found it took 4-5 applications to remove all of the paint. The wood trim that’s currently in the basement has had two applications so far, and will probably take at least one more. But it is still nice to see some quick progress on the door jamb, at least. With that much bubbling, I decided to scrape it away. One of the nice things about this stripper is that the paint peels off in sheets, so there’s no dust, and minimal mess. Plus, it doesn’t really smell bad, just a little soy-ish.

I’m sure it will take a few more applications to get it where it needs to be, but at least it’s a start. And it’s especially important since we’ll start drywalling once all of the plumbing work is finished. Then it will really be a room!