Grrrrrout
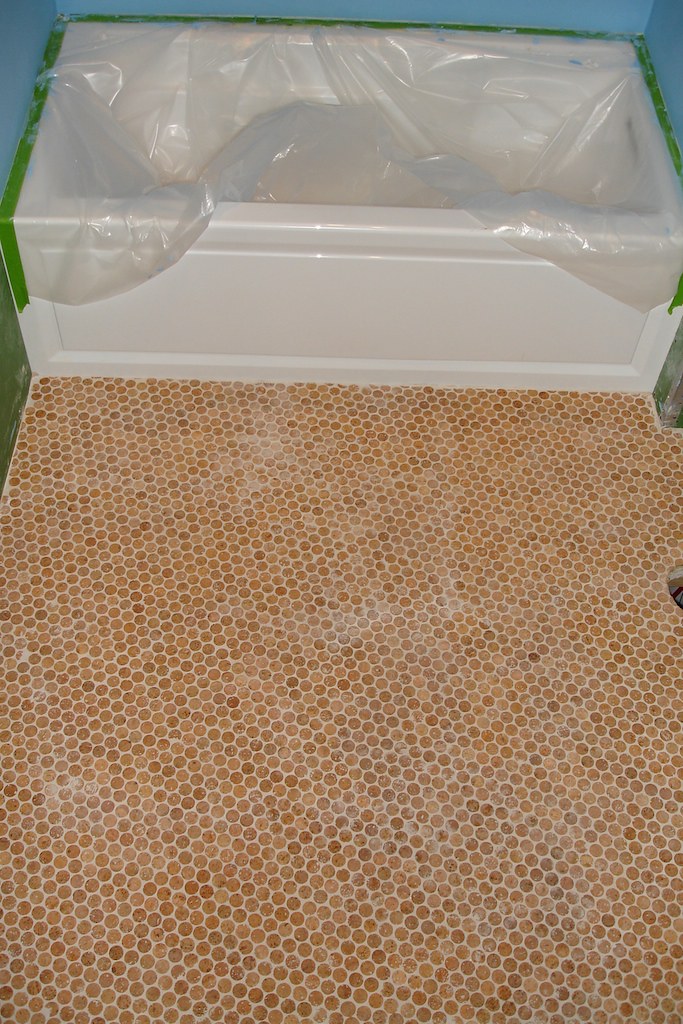
Saturday afternoon, with the recently installed floor tiles sealed the day before, we set about grouting them. Mixing the grout was simple enough, as was spreading it around the floor. Things started to get a little tricky when it came time to remove the excess. Since the tiles aren’t uniform heights, a lot of grout was left behind. No big deal, we thought, that will just come off with a damp sponge. Alas, it was not to be…

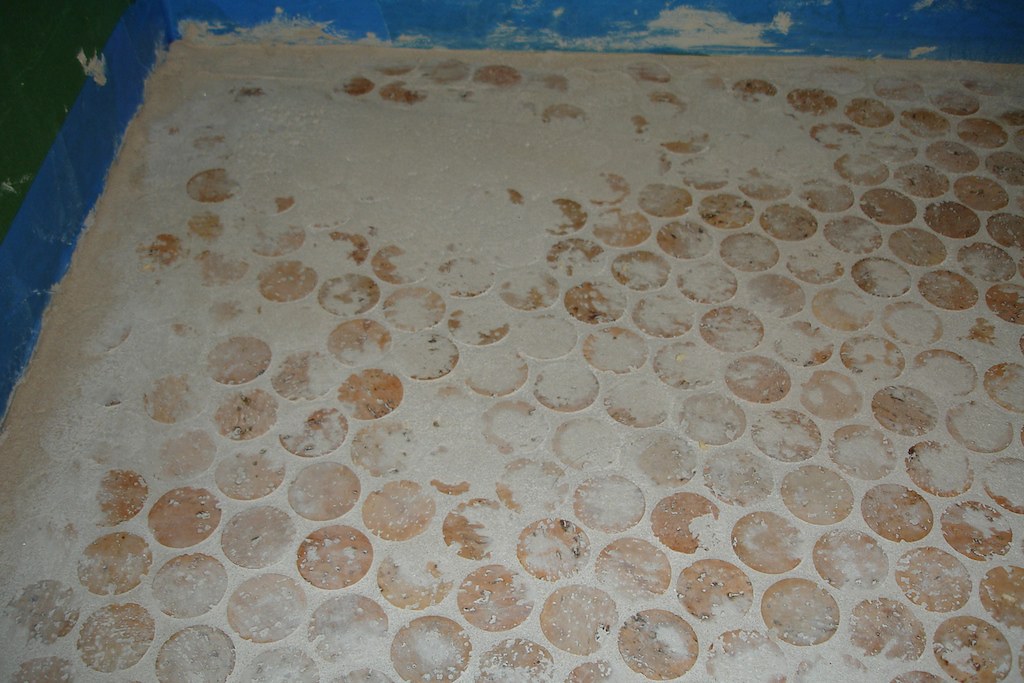
Now, I should say that the entire floor was not that bad; those were two particularly bad spots. But the vast majority of it was covered with a film of grout (far more than just a “haze”) that simply wasn’t coming up. I suspect there were a number of factors at play, but mostly, I think the grout set up faster than we were prepared for; it was a fast-setting grout, and it obviously means business.
That’s all purely academic, however. We still had a floor that looked like an unmitigated disaster on our hands, and needed a solution. At first, we tried just scraping it off, being careful not to damage the cork. It worked, but it took around 2 minutes per tile. With the tiles being around 1 inch in diameter, I don’t even want to think about how long that would have taken, so we needed a better solution. I tried calling the tile manufacturer; but they had suffered a fire the previous day; at least that put my disaster a bit more into perspective.
I then tried calling the grout manufacturer, with no answer. The instructions for the grout specifically advised against acid-based grout cleaners, and referred me to their “Online Technical Bulletins” for a solution to hardened grout on tiles. Except that their web site doesn’t have online technical bulletins. Handy. Google came to the rescue, finding a PDF of the manufacturer’s grout cleaning instructions. Apparently, muriatic acid is a no-no with pigmented grouts (which ours is), but phosphoric acid is acceptable. Off to the store!
We pretty quickly found a grout cleaner that contained primarily phosphoric acid. $24.95 per teeny tiny little bottle. At that point, anything sounded better than the alternative of completely re-doing the floor, so we headed for the checkout. The bottles rang up at $6.02; our first victory of the day, at last!
The instructions on the cleaner called for a 5:1 ratio of water-to-cleaner. I knew right away that wasn’t going to cut it, so I mixed it at a 2:1 ratio and tried it out. The instant the cleaner hit the hardened grout, it started bubbling - a very promising sign. After letting it sit for a few minutes, some scrubbing with a nylon brush to try to loosen things up, then a wipe-down with clean water.
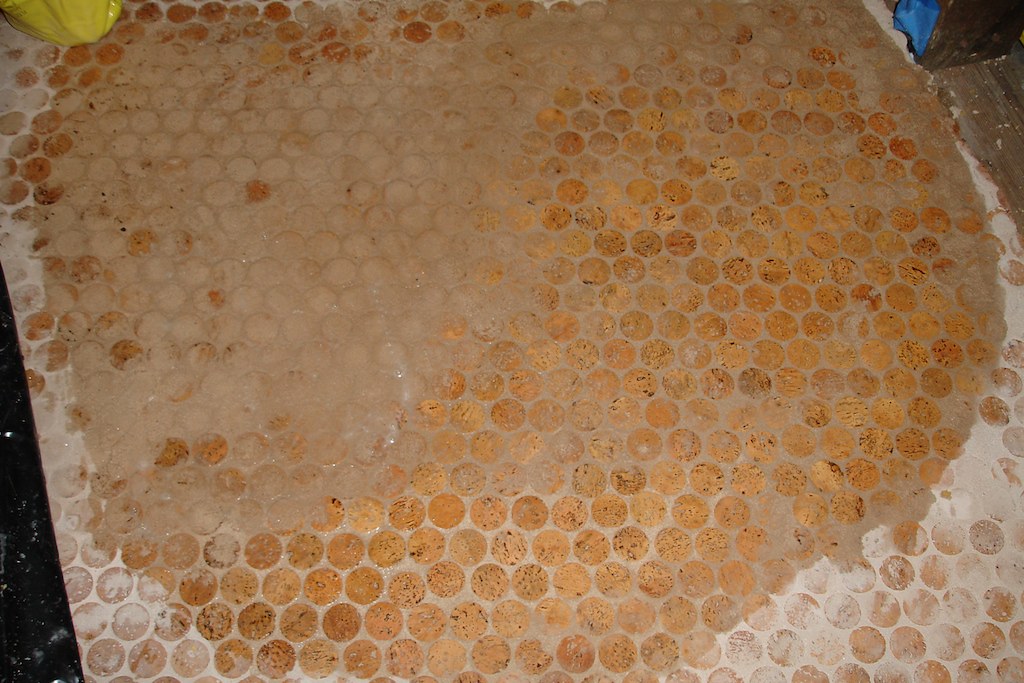
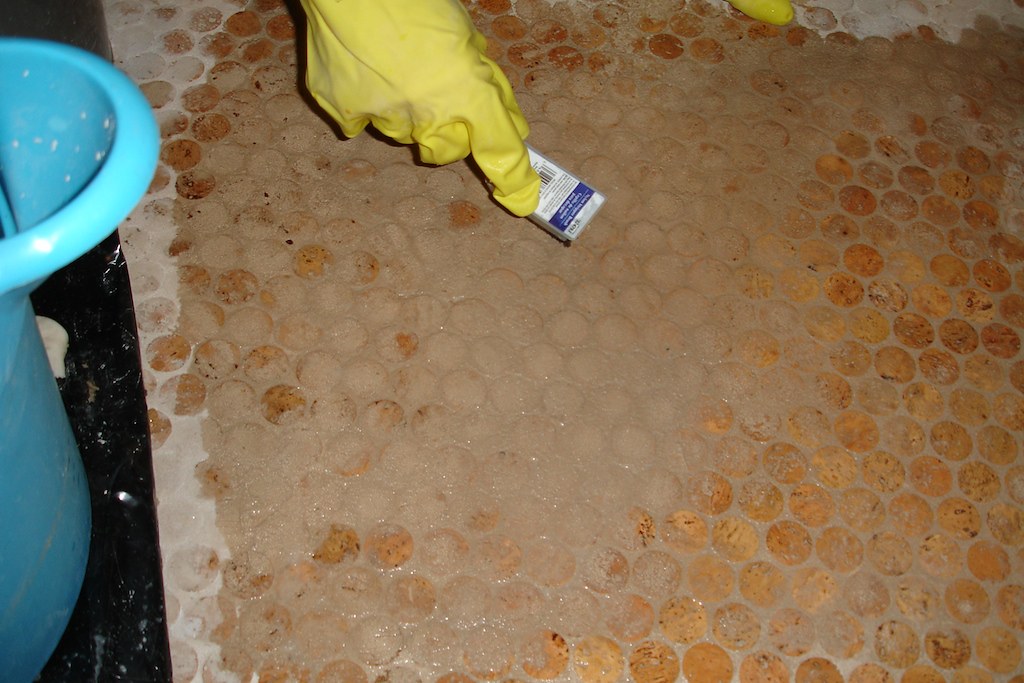
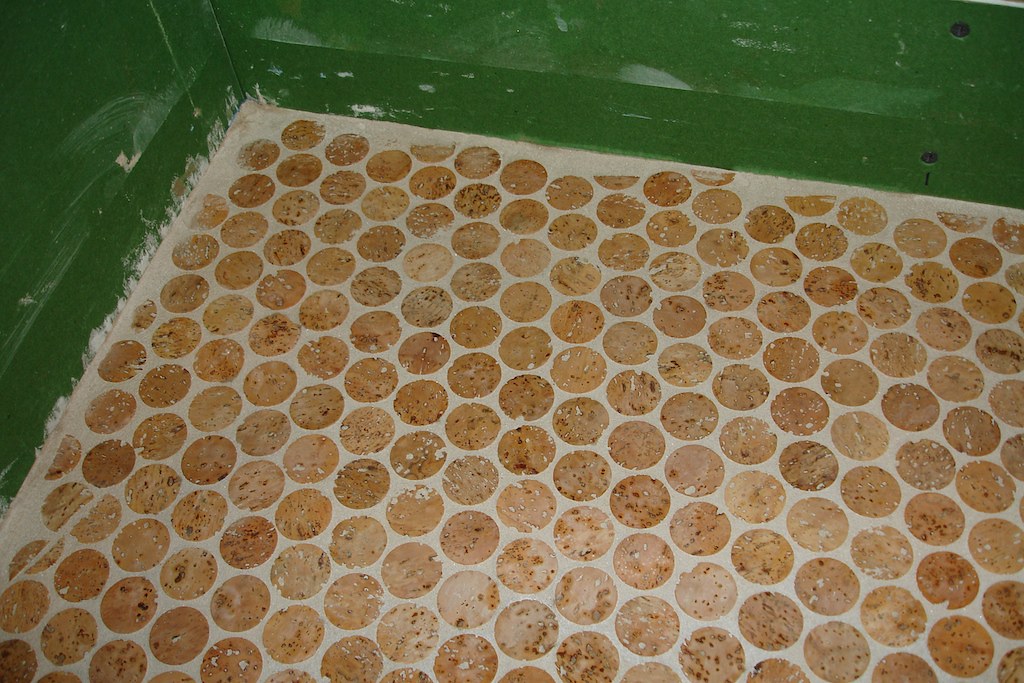
Finally, a real victory! We tried a few different techniques, and ultimately found that stronger 1:1 mix of water and cleaner did the trick effectively. As best as I can tell, there’s only a slight lightening of the grout color, and no damage to the tiles that I can see. There’s still a few spots with light haze that will need to be cleaned up, but that will probably wait until after other messes are out of the way (like painting). Finally, the floor was looking great, and we only had to spend 10 hours cleaning it with caustic acid to get there.
For the before and after…

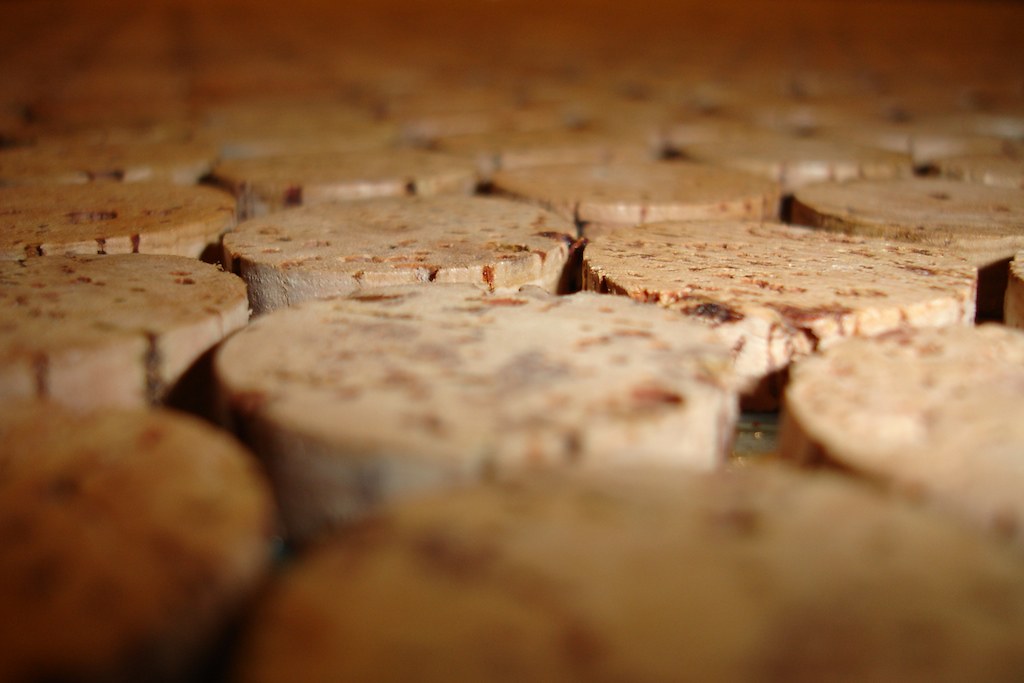

It was a lot of work, and even more frustration, getting to the finished result, but it was very much worth it. We’re both loving the look of the floor, and can’t wait to get it completely cleaned and sealed with two more coats of polyurethane.
My brother showed up again on Sunday to help with taping and mudding the drywall, which was actually more enjoyable than I expected. Although it was also terribly tedious, since there’s so many corners, seams, etc. to contend with in such a small space. But at least my brother and I got through the first coat yesterday, and Brad and I did the second coat this evening. With any luck, we’ll be done with the drywall within the next few days.
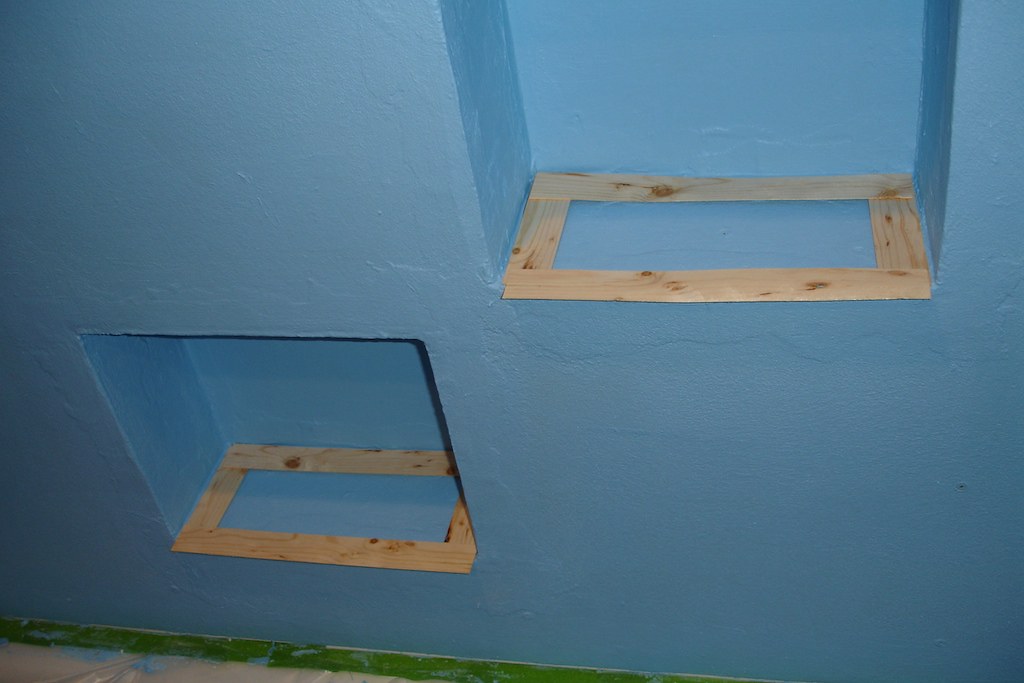
I also spent a little bit of time today making templates for the shower niche shelves. We’re using some pieces of slate we found at a building salvage store, but they’re significantly larger than we need, so they need to be cut down. Since nothing is ever perfectly square, it’s easiest to just make a template the exact size and shape needed, which is what I did. I cut some very thin strips (around 1mm thin) off a 2x4, and then trimmed those down to the sizes I needed. A dab of hot glue in the corners, and I had templates! Now when it comes time to cut the slate, I can use those to mark and cut the pieces exactly as I need them.
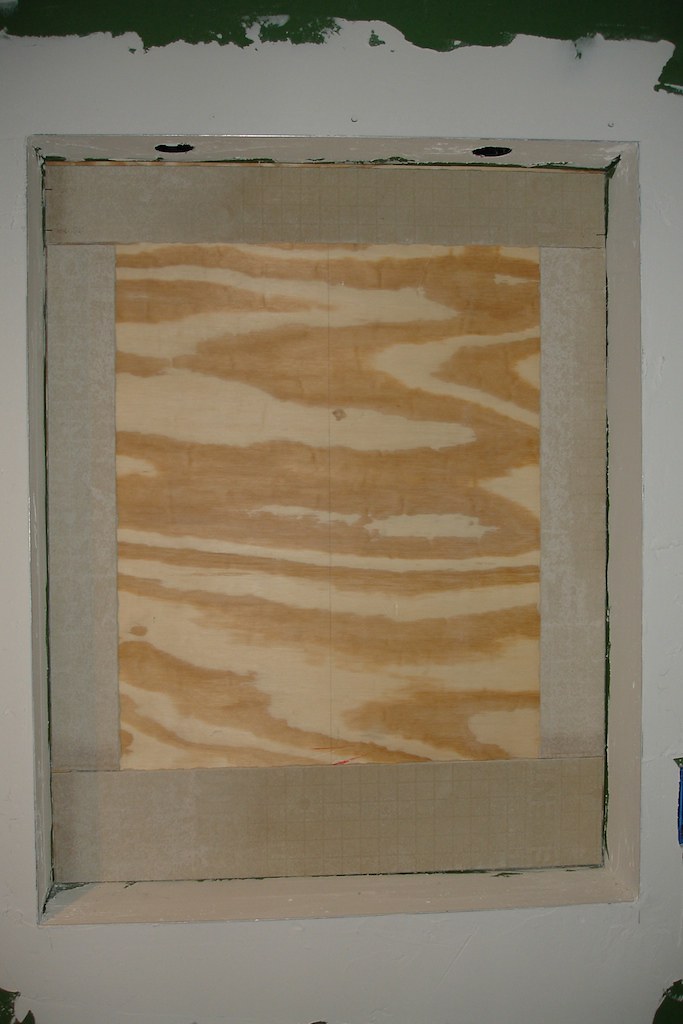
And the final installment in today’s excitement was to install the cement board for the mirror niche. The mirror (which will be another project) will be a few inches smaller than the niche in each dimension, and the wall around it will be tiled identically to the shower niches, including a slate shelf. While I can’t template for that until the drywall work is finished, it is at least nice to have the cement board in place.