A room with a bath
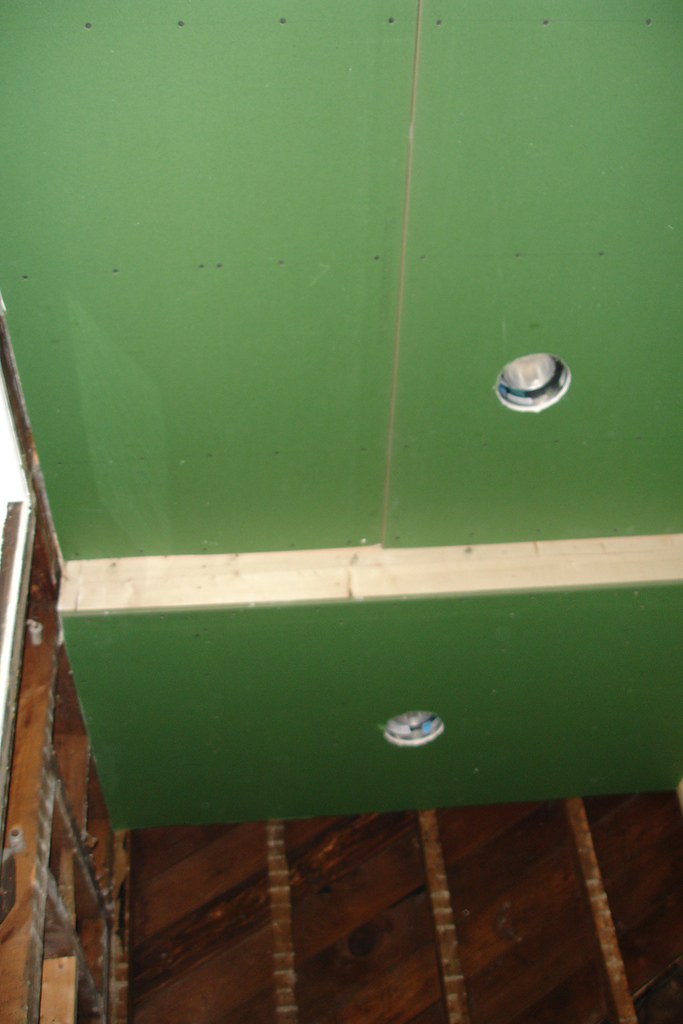
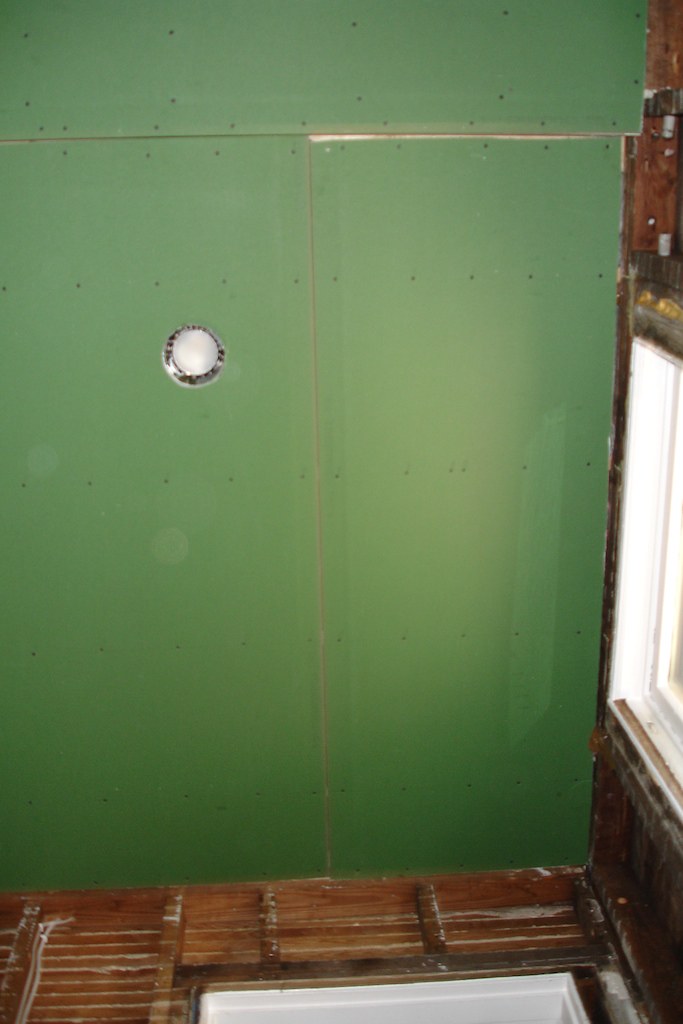
With all of the insulation in place, Friday marked the start of the drywall installation. We rented a drywall jack for $25 and set to putting the ceiling in place. Since the we lowered the ceiling height in the shower area by 6 inches (to 8 feet even), we decided to start there, since it’s just one piece. Getting it cut to size was easy enough, and with the clever trick of rubbing chalk on the bottom of the light fixture, we raised the sheet into place and got a nice outline of where to cut for the fixture. The next piece, in the main ceiling area, had four (4) holes to cut, and it was much trickier to get them all right. We still have to enlarge the hole we cut for the exhaust fan, but at least it’s not completely lost behind drywall.
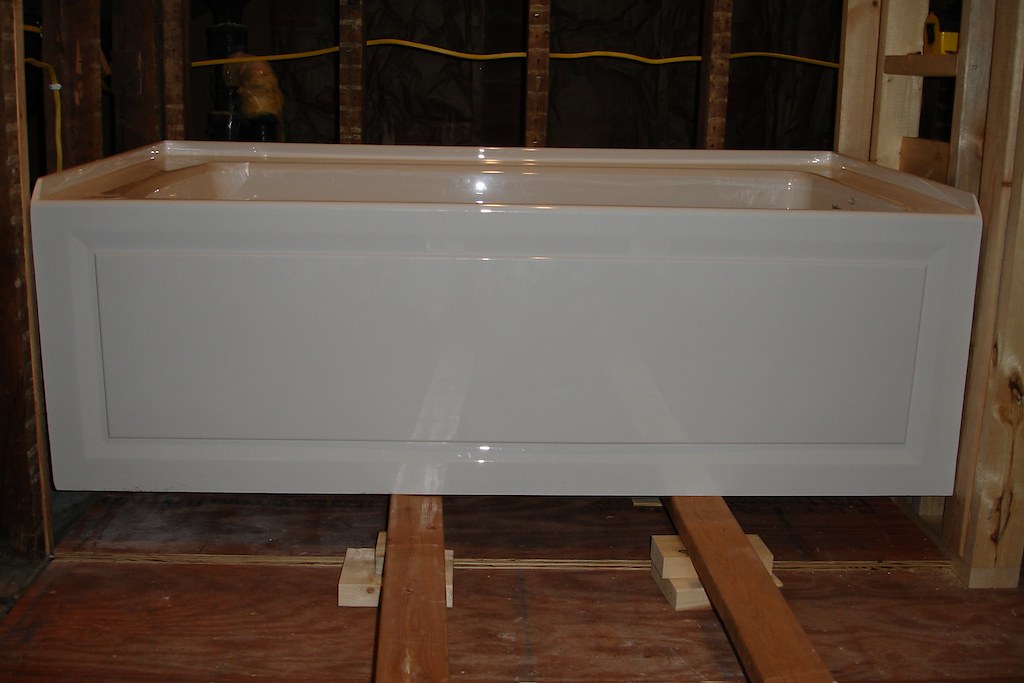
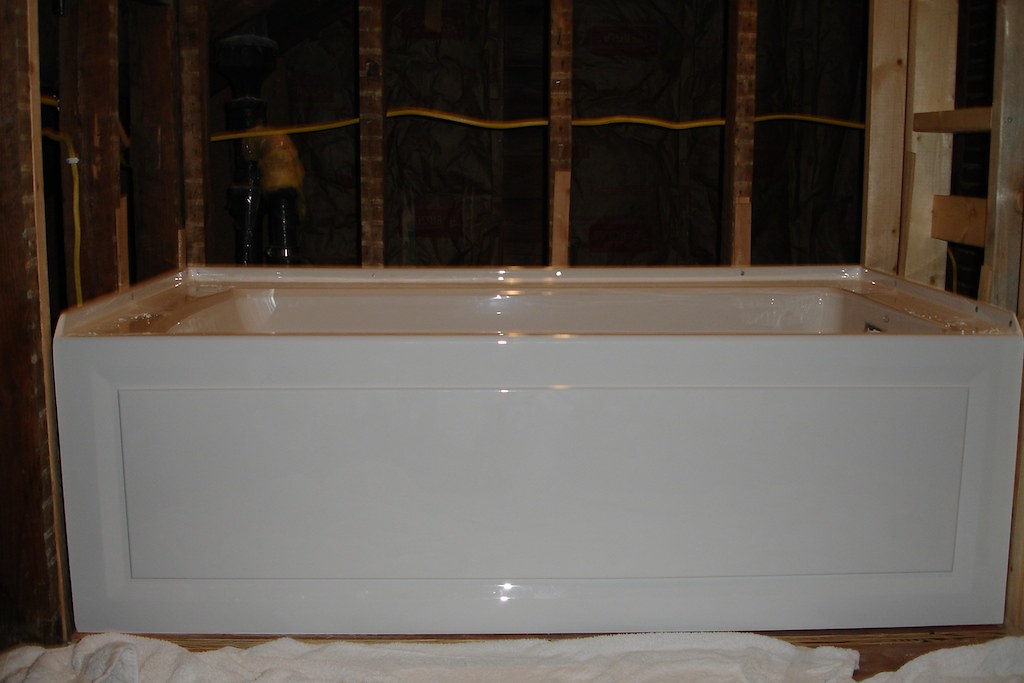
And today, with the help of my friend Jeremy, we got the bath tub up the stairs, and set it into place for a dry fit. Everything lined up right, and there’s just enough free space on either side for an easy fit.

Next up was assembling the drain and overflow for the tub, which comes as a kit of PVC parts that you get to measure and assemble yourself. Sort of like a model car kit, but with much less excitement, and glue that will make you a lot loopier if you’re not careful. I bought organic vapor cartridges for my respirator for doing all of the PVC work on the project, since I can’t stand the smell of PVC cement, and it has really worked out well. I can’t smell a thing with them, which is great.
Once drain was all glued together and installed on the tub, we were able to start thinking about getting it permanently installed. The manufacturer suggests two methods to set the tub in place; one involves using construction adhesive on the support feet, and the other is to set a bed of mortar/cement and place the tub into that. We opted for the latter method, since it ends up supporting the entire base of the tub, not just the feet. The only question… how to get the tub in place, over the mortar, without making a huge mess?
The answer!
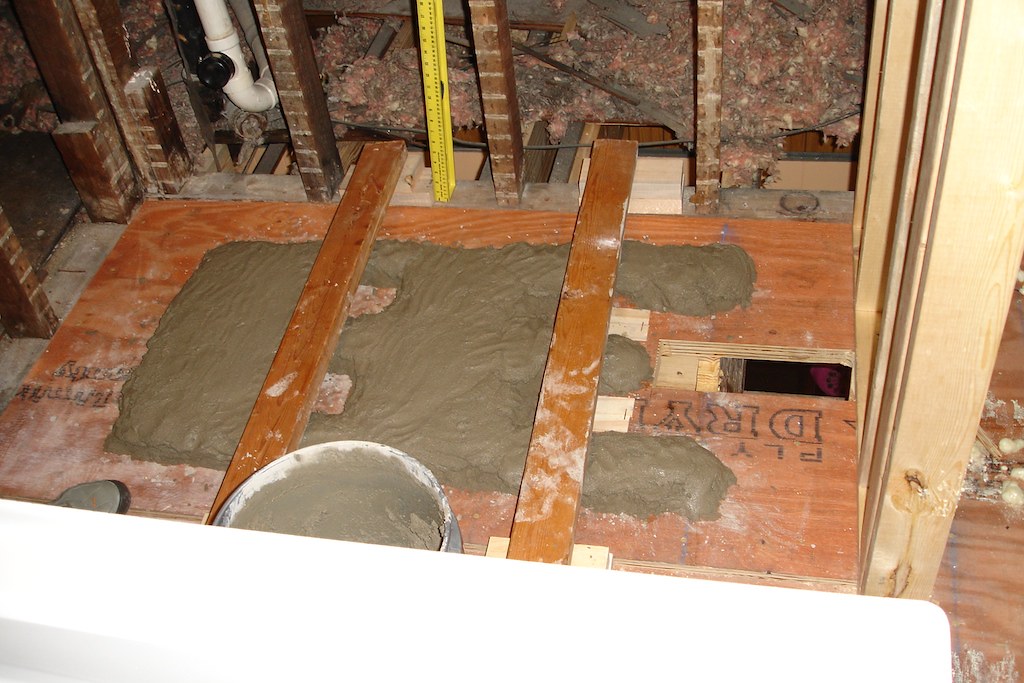
We used two 2x4s, one under each set of feet on the tub, and propped them up at either end with some addition blocks. That way, we could slide the tub into place in the alcove, keeping it safely above the mortar. Once it was in the right spot, it was just a matter of pulling the 2x4s out and lowering the tub into place. With a few practice runs, it worked rather well.
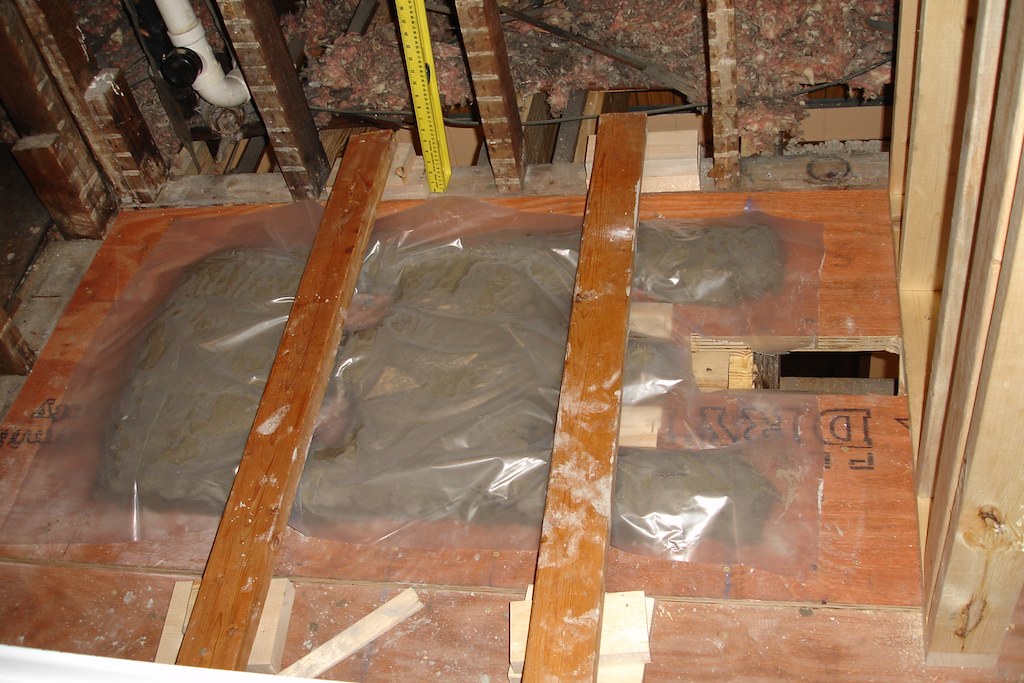
Following the directions on the mortar mix, we mixed up two batches, and started spreading it out on the subfloor. The tub manufacturer suggests a 2" deep bed under the entire tub, being careful to leave space where the feet need to rest, so they can sit directly on the subfloor. So we did just that, and covered it with plastic, to prevent it from bonding to the tub.
Is it a skull?
With the mortar laid down as directed, we slid the tub into place and lowered it into the mortar. Completely out of level! We tried standing in the tub, jumping up and down. Still nowhere near level! Since the tub is sloped towards the drain, there’s much less room underneath as you near the drain end, and there was just too much mortar on that side. ARGH!
We pulled the tub back out, scooped out a bunch of mortar and smoothed out the rest, and set the tub back into place. With just a little bit of persuasion, the tub is now sitting nice and level. A few shims to snug it up to the studs and a nail through each stud, and now it’s nice and secure in place.
Next up on the list is getting the drain for the tub plumbed into the stack. Then we can run supply plumbing up to the bathroom and test it out. It’s starting to actually look like a bathroom in there!